
Staining your DIY project is not always the right finish for it. perhaps you built a nice chest or a dresser for one of the bedrooms. And staining it really won’t match the decor. There is no harm in painting it then. So you might ask yourself how do I go about painting such a lovely piece? Without messing it up? Here are some tips on how to paint wood on that finished DIY project.
Here’s how to paint wood without making a major mistake
I have heard many people disagree on this first step. Some will tell you to while others will tell you no need to. But in my opinion, it is a must and the first thing that I always do.
Sand It.
Li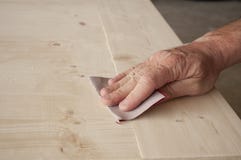 ke I said people will tend to disagree with me. But that is fine I am writing about my preference. So you can or don’t have to follow this first step. Even some of the primers will tell you there is no need to sand.
But I have found that sanding it (only to rough it up a bit) helps the paint stick better. Taking the worry of any chipping that may occur. I like to use a 150 grit sandpaper. It works very well for what I need. if it already has an existing varnish or other finish. I would use an 80 grit sandpaper.
Remove Residue:
It is very important to make sure you wipe down the surface to remove any leftover residue. I use a tack cloth for this. Don’t ever use a paper towel or anything claiming to be “lint free” they are not. They will leave lint behind which you don’t want to paint over. Just do yourself a favor and invest in a tack cloth.
Prime It:
I  like using a mini foam roller for this step in how to paint wood. In addition a foam brush for those hard to reach areas. They will give you a better finish. With no brush marks or left behind brush hairs. Allow the paint to fully dry and at this point, you can sand away any drips. Use a 220 grit sandpaper for this. Of course, wipe away any residue with a tack cloth. If you don’t do this step correct the finished product will never come out right.
Paint It:
I always apply three thin coats of a semi-gloss latex paint. Again only using foam rollers and brushes. Allow to fully dry and sanding with a 220-grit sandpaper between coats. This will remove any drips or imperfections. Use a fresh tack cloth on each sanding to wipe away any residue. This is important because any lint left behind will show badly after the final step.
Protect It:
Finally using a new foam roller and brush. Apply a thin coat of polyacrylic waterbased protectant. Go over very lightly to smooth any bubbles that may occur.
So that is the nitty gritty on how to paint wood. Hope you are able to take something away from this piece. If you want more tips than click on the links below.